Fork to Live with Cloudflare Pages and Astro
Making this blog, in hour or so, with Astro and Cloudflare Pages.
I needed a subject for a first post, and realized that the process of getting from “I should publish a blog” to “I have a blog” was much easier than I ever thought it would be by using these tools (Astro and Cloudflare). The process seems worth sharing.
There are a lot of steps, but each one is easy and many people will have already satisfied several of them. The order of things might seem to be backwards, but bear with me.
Get your domain name
Register a domain name for your blog with any registrar. I used AWS Route 53 but there are many others, including Cloudflare itself (If you want to use Cloudflare, you can defer this step until you get a Cloudflare account, below.)
(Optional) Get a github or gitlab account, or both
I use both. Github because the Astro template I wanted to use is a Github template with git automations that run when you fork it. And Gitlab because that is where I prefer to keep private projects.
Both Github and Gitlab are fully supported by Cloudflare Pages automations, but you can keep your repository anywhere you want (including your own private place) if you to this route you will have to upload your built site to Cloudflare Pages some other way.
Create your Astro project
You can start an Astro project directly with the Astro Build site. You should look at that site to get Astro installed. You can then either make your site project as described on that site, or come back here to go through using a template project.
Instantiate the starter template for the Cactus theme for Astro
On github, sign in and find the repository to base your blog on. I used Astro Theme Cactus by Chris Williams. There are other theme templates you can browse at Astro Themes.
Now press the “Use this template” button.
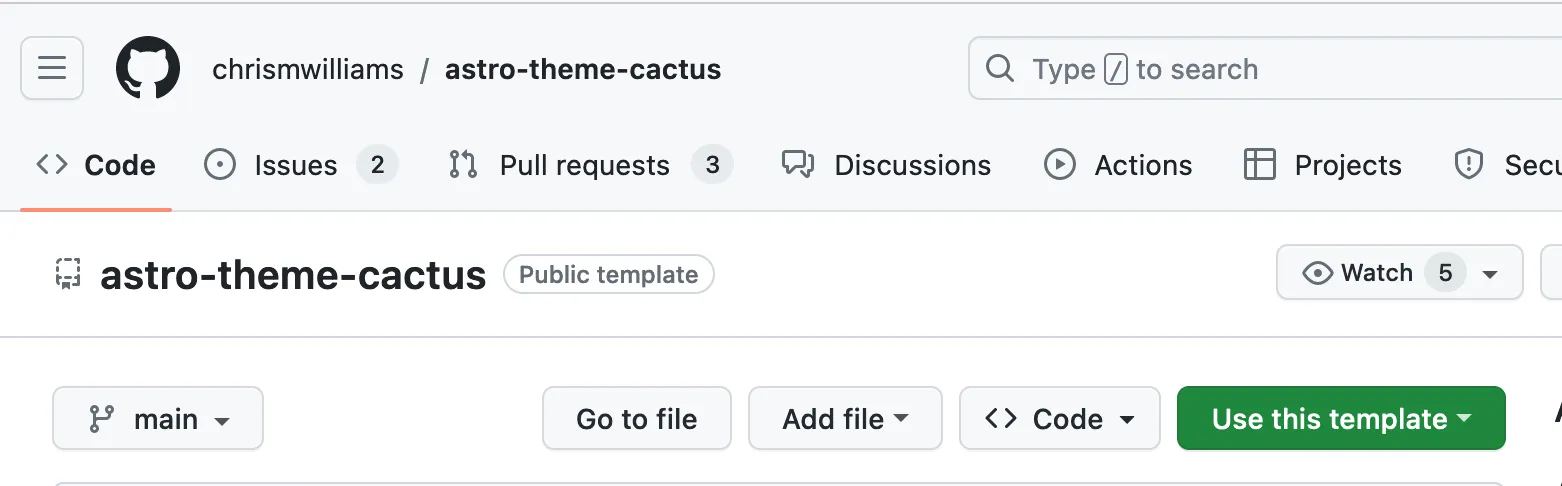
This will create a new repository in your github account and run the github automation in the repository (at the time of this writing, there is no workflow action, but since it is a template project that could change — you always want wait for any actions to complete before cloning your new fork and starting to edit).
Edit defaults and push to your git host
- Make the changes suggested in the new project’s readme.md and commit the changes.
- Make a new branch called
developand check it out. - Push both branches up to Github.
- If you plan to keep your repository somewhere other than github, push both branches to that repository.
You want both a main and a develop branch to take advantage of Cloudflare Pages’ preview feature, which I’ll discuss below.
Get a Cloudflare account
Visit the Cloudflare website and sign up.
Connect Cloudflare Pages to your git project
After you’ve completed the sign up process and logged in, expand the “Workers and Pages” section of the control panel. Somewhat unintuitively, the section named “Websites” is about DNS management, not creating your site.
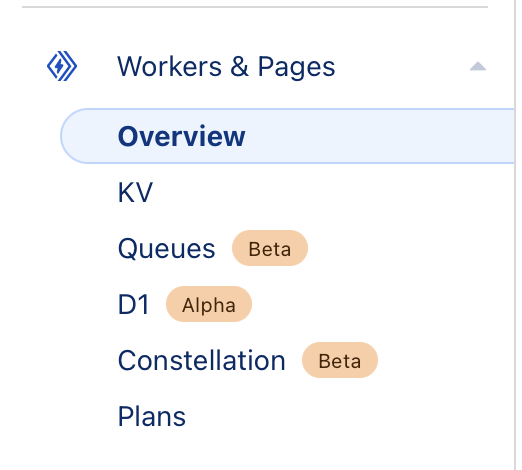
In this menu, you can select “Plans” to see the pricing options available, including the free plan.
In the Overview section you will find the controls to add your Cloudflare Pages project.
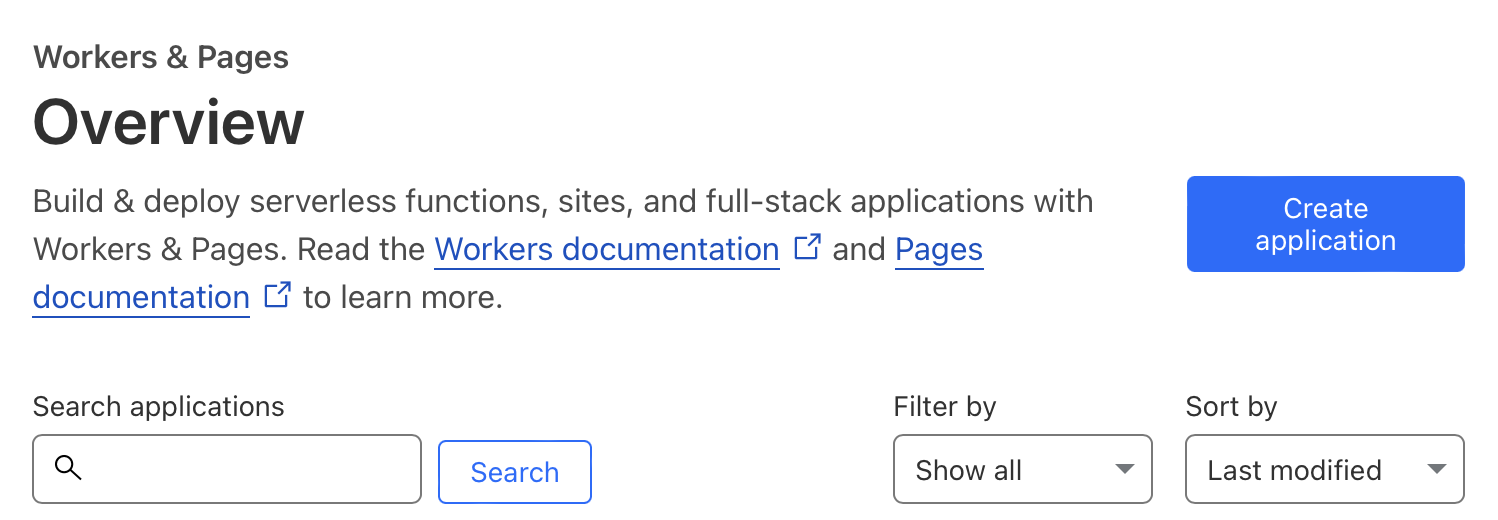
Click on Create application, and in the page that opens, select the Pages tab.
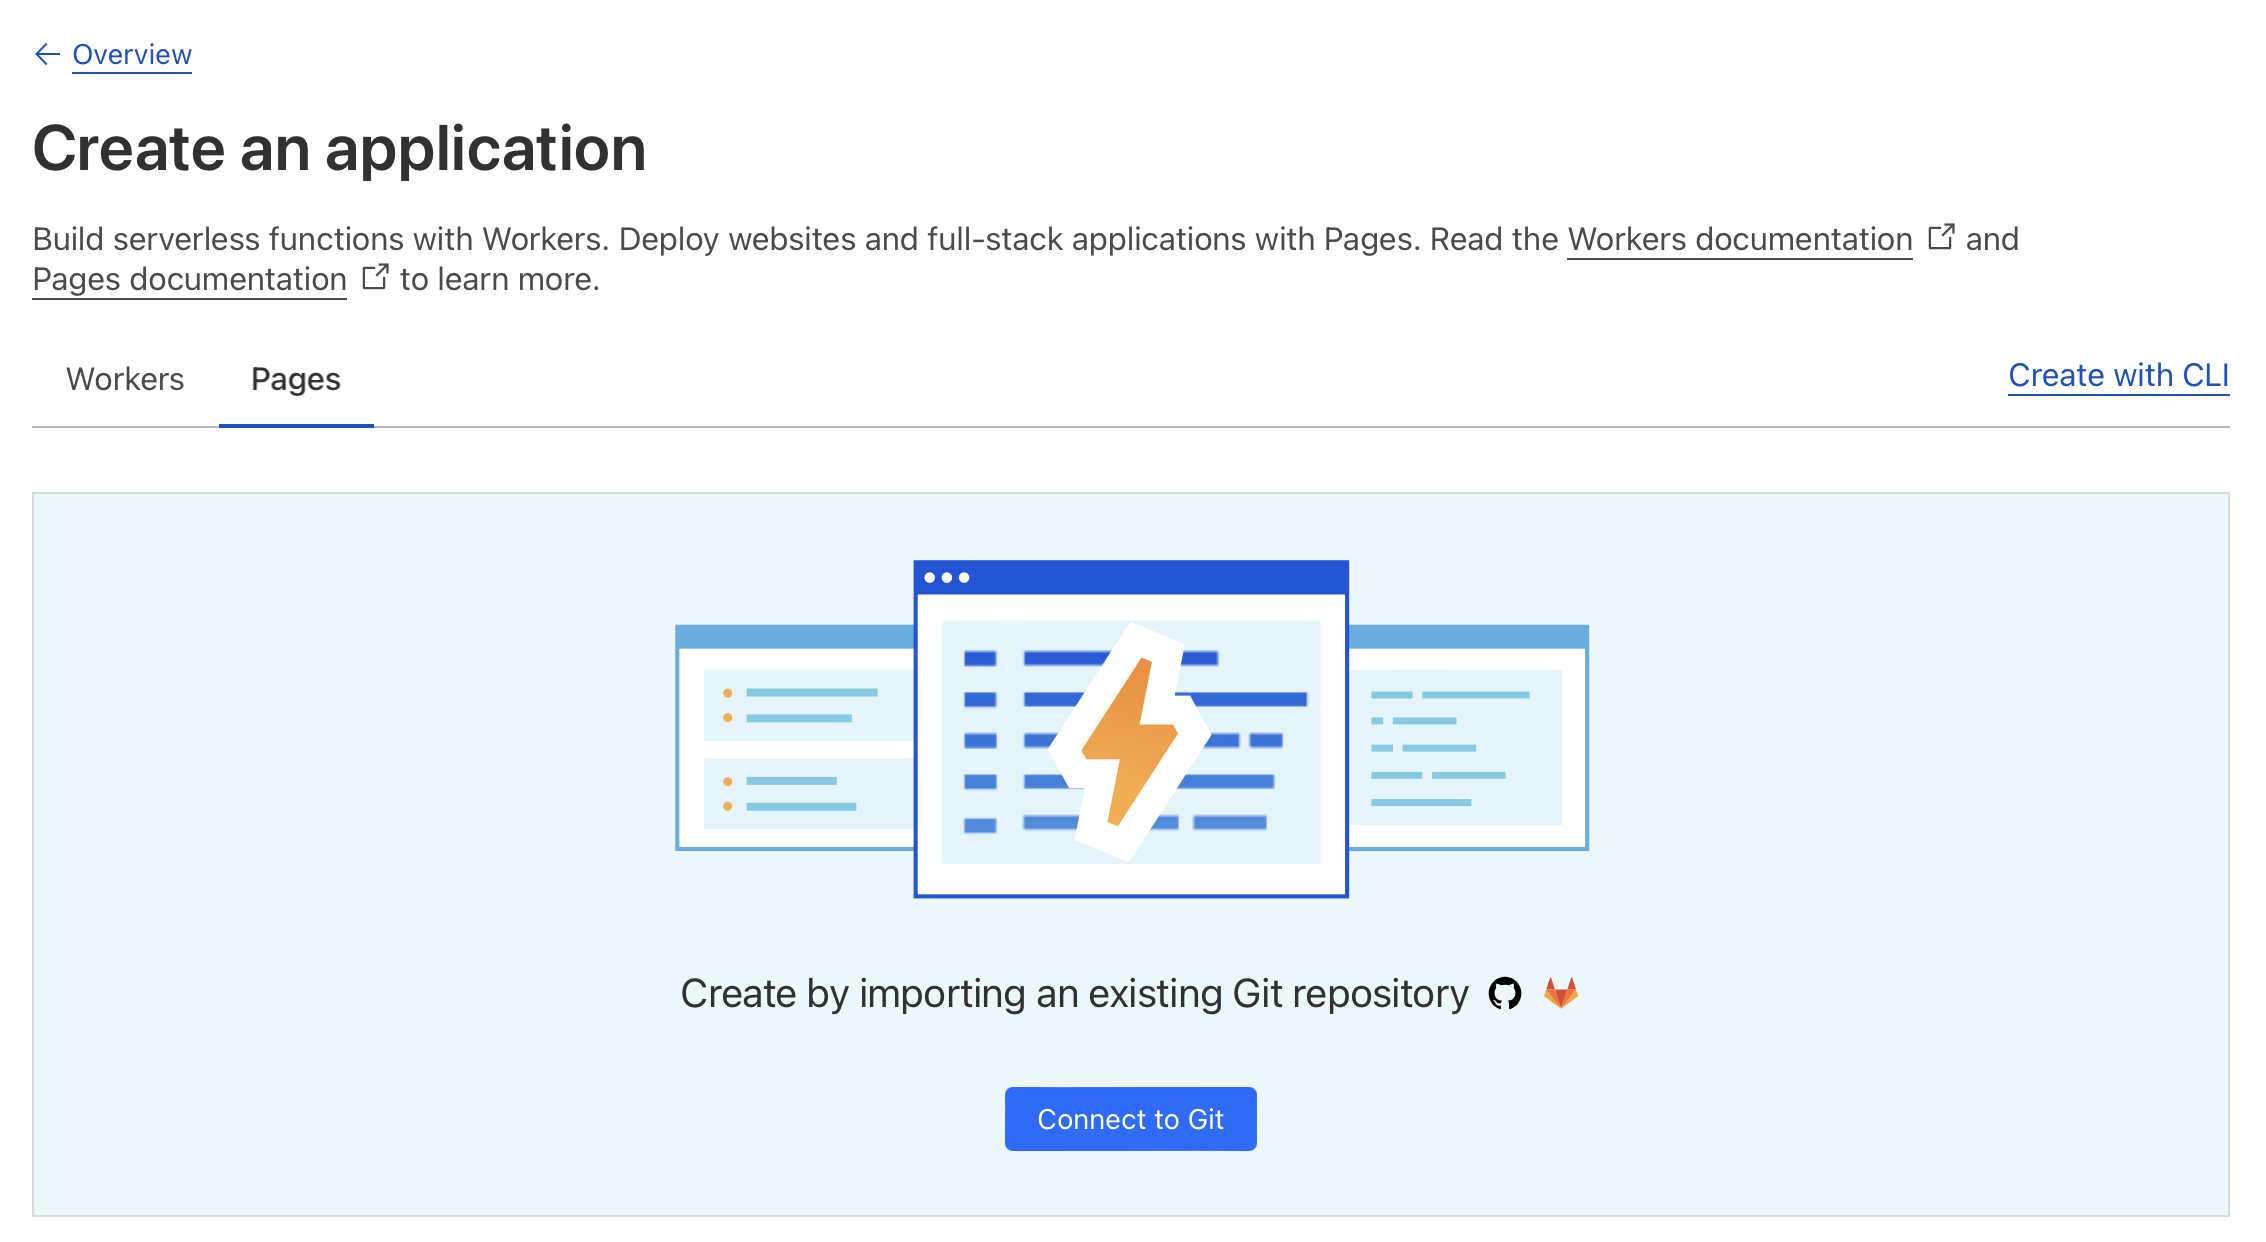
Click on Connect to Git, and then select the GitHub tab. Finally, click on Connect GitHub.
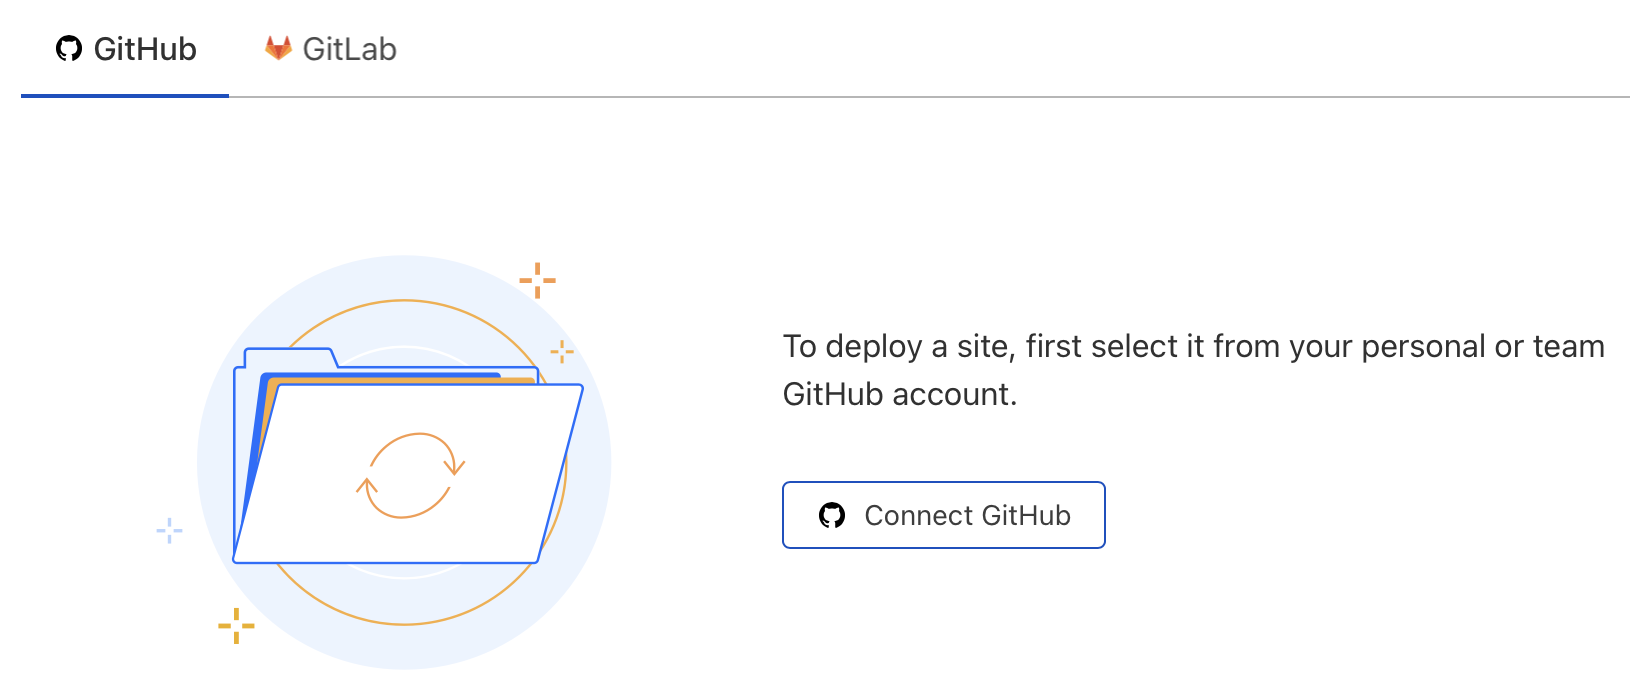
You will then go through a GitHub login process where you will be asked where you would like to install Cloudflare Pages. Don’t worry, you are not “installing” anything, you are just setting up the permissions that Cloudflare Pages needs to read your repository and get notifications. I recommend you grant permissions to the specific repository that holds your blog.
The process is similar if you are using GitLab.
When complete, you will be redirected back to the setup workflow in your Cloudflare account. If you only granted permissions on your blog project, the form will be pre-filled with your selections. But the Begin Setup button will not be active until you click on the pull-downs for the account and repository fields on the form.
If you granted permissions to your whole GitHub account, then you will have to select your blog’s repository from the list of all your repositories.
Click Begin Setup.
Now you’re presented with a form that is fairly self-explanatory.
- Set the Production branch to
main - Set the Framework Preset to
Astro
The rest of the form will be filled out for you when you set the Framework Preset. The pre-filled values will be fine if you’re using the Cactus template (and probably any other site template).
- Click on Save and Deploy
The workflow will show you progress as your repository is cloned, built and deployed by Cloudflare Pages. The process will only take a minute or so.
- Click on Continue to Project after the build/deploy is complete.
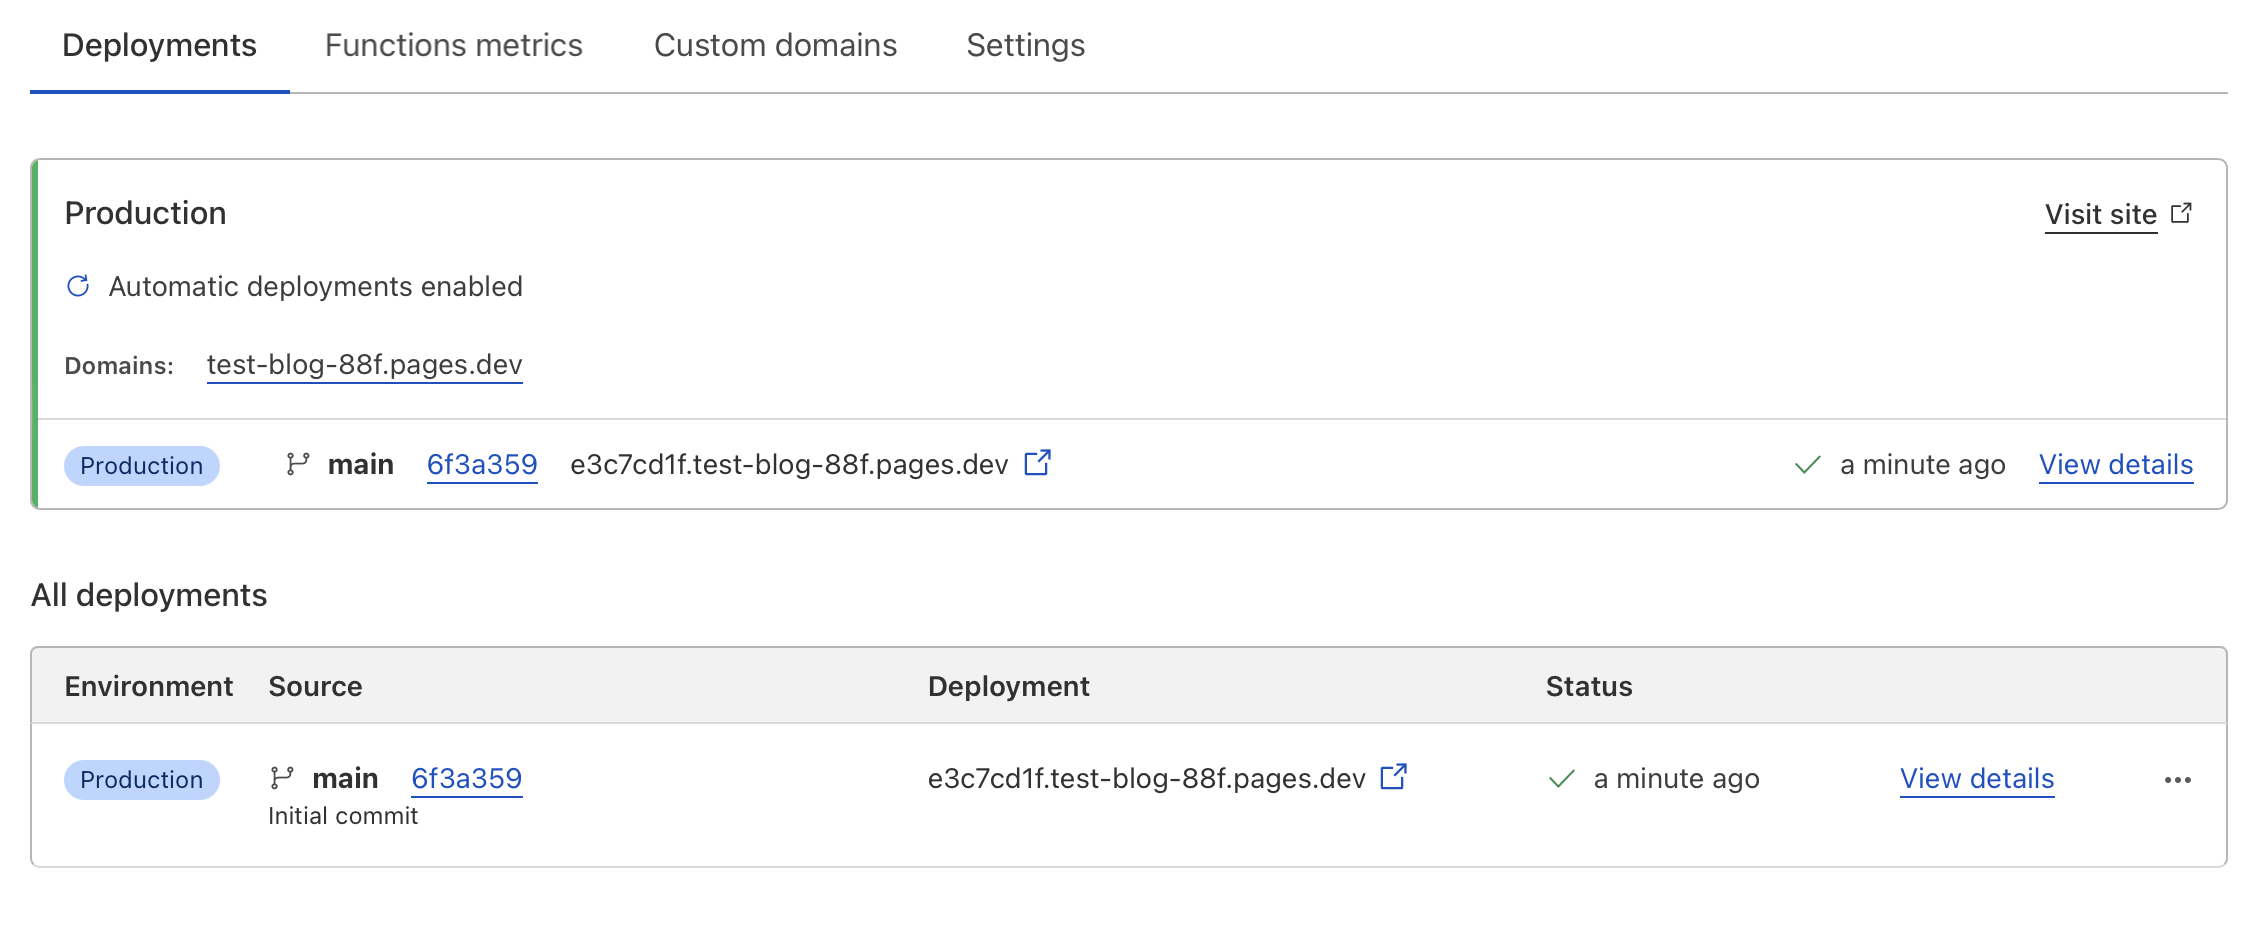
Congrats, you have your blog deployed to the web. Examine the deployment tab and take note of several things:
- You have a single deployment of the “Production” branch of your repository (
main). - The site is deployed to a Cloudflare Pages domain, and you can visit the site right away with links provided.
- Notice the domain in the larger box called Production is different from the domain in the list of all deployments below. As you do more deployments, that list will grow and each item in the list will have a unique domain. But the Production domain wil be stable across deployments and always represents the current deployment.
If you created a develop branch in your repository as suggested above,
you will see two deployments being built, one for production and one for “preview”.
The preview deployment is based on the develop branch and the production deployment is based on main.
More on previews later…
Set your domain name to your Cloudflare pages site
If you haven’t registered a domain, now is the time to do it. The Cloudflare control panel has an item Domain Registration where you can do this if you want to use Cloudflare as your domain registrar.
Once you have a domain, return to the Workers and Pages section and click through to your blog project.
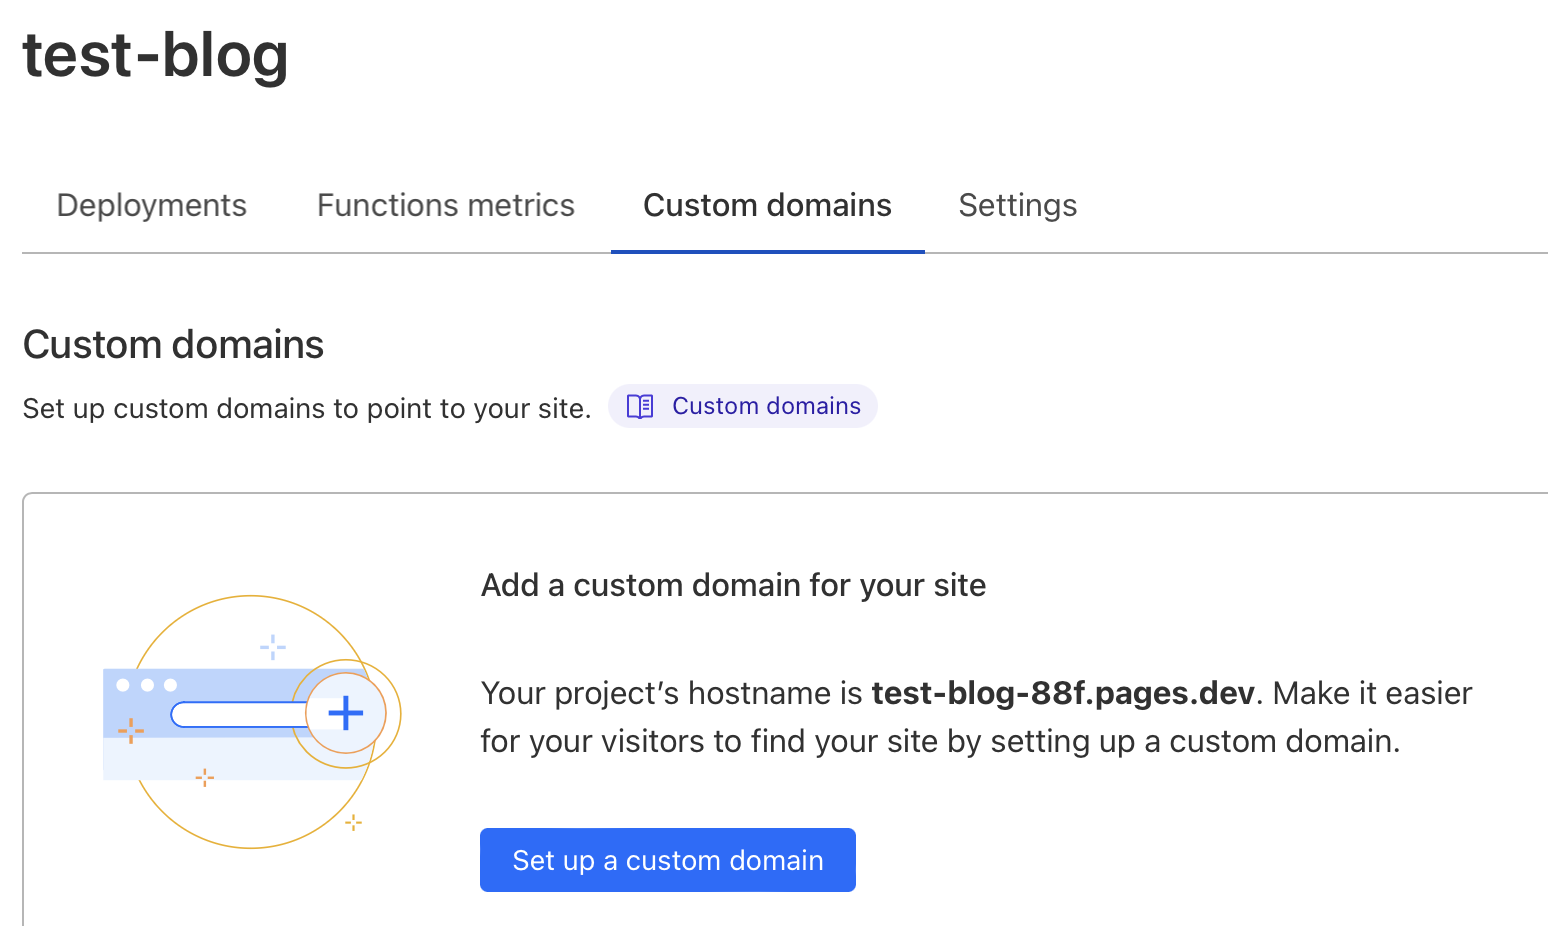
Click the big blue Set up a custom domain button.
Fill in the domain/subdomain field with a subdomain of your registered domain name.
I suggest something like blog.my.domain or www.my.domain, but you can also just use the base domain name if you like.
You will then be given a choice to use Cloudflare or “My DNS provider”. I didn’t use Cloudflare for DNS, so I’ll go through “My DNS provider”.
- Click on the Begin CNAME setup button in the “My DNS provider panel.
- Use the information on the resulting page to create a CNAME record at your DNS provider.
- Once your CNAME record is created, you may need to wait a while before Cloudflare can see it, but go ahead and click the blue Check DNS Records button.
You will see a notice that the records are being checked and that you will get an email when your domain is activated.
Eventually you will receive that email, at which point your blog is live at your custom domain.
Use Cloudflare Pages’ preview feature
The previews feature allows you to work in your develop branch and see your site deployed to a preview url (without impacting your live blog) each time you push to that branch.
When you merge develop into main, your live blog is automatically deployed.
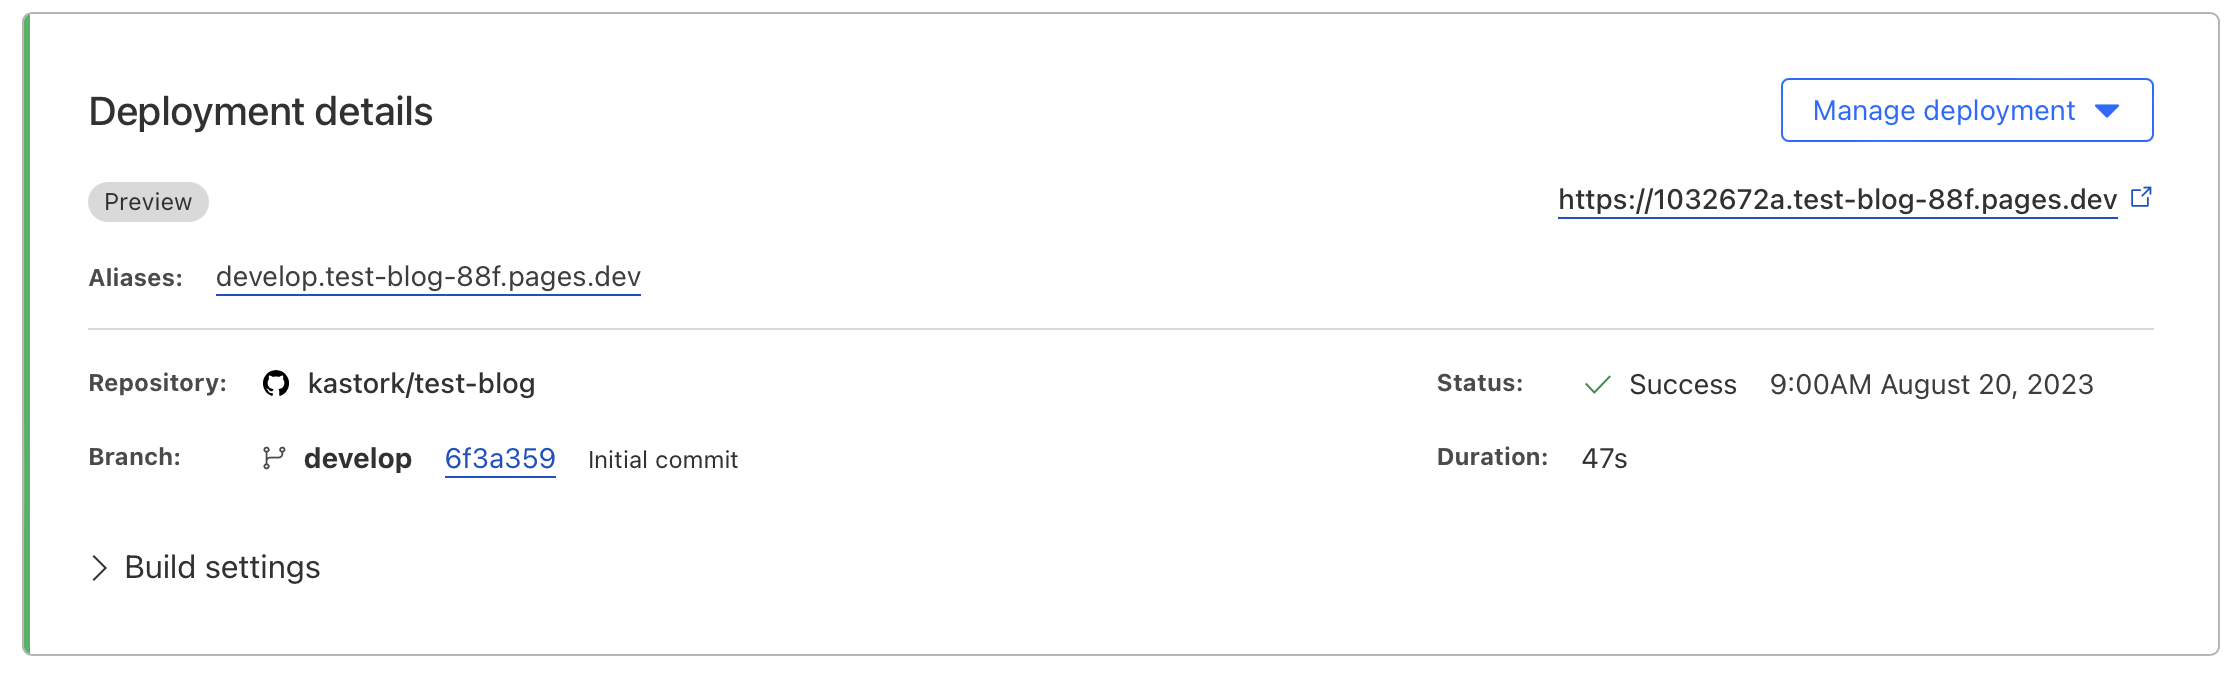
There is a stable preview URL that represents the last push to develop.
To find that URL click the View details link on the most recent “preview” in the All deployments list.
The stable “most recent” devolop URL is labeled Aliases on the upper left of this page, the other URL,
on the right hand side, is specific to this build/deployment.
Wrap up
Well there you go, you have an Astro blog in version control that has full git-push-based publishing automation to previews and live hosted at your own domain. The live blog is a high-performance static site deployed to Cloudflare’s awesome CDN.
Don’t want to use Astro Theme Cactus?
Have a look at Cloudflare’s howto for Astro.
Don’t want to use GitHub or GitLab?
Read the howto for uploading builds to Cloudflare directly.
Things to explore next
I may do posts on some of these topics, I’ll update this post when I do.
This blog doesn't use a comment system, but feel free to send me a secure message on Keybase) (You do not need a Keybase account to send a message, just hit the big blue Chat with kastork button.)